Have you ever sent an email with classified information to the incorrect recipient; or perhaps the email contained an embarrassing typo?
Whilst it is possible to ‘recall’ an email, this does not always guarantee that the recipient has not opened and read its contents.
Did you know that Outlook for Windows has a handy ‘Delay send’ feature? It can be used to schedule the delivery of a specific email. When applied universally, can delay the sending of all your emails.
This feature gives you a grace period to review, edit or cancel the e-mail before it sends.
How do I schedule sending an individual email?
Open Outlook, compose an email and select the recipients.
To schedule a delivery time, select Options > Delay Delivery
Then select ‘Do not delivery before’ in the dialogue box. You will have the option to select a date and time for the email to be sent out.
How do I delay send on all my emails?
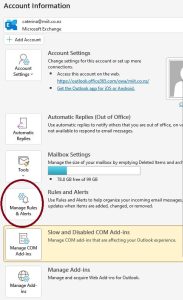
Go to the File tab in Outlook and click on ‘Manage Rules & Alerts’
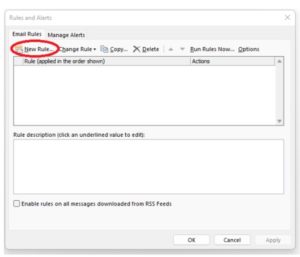
In the Rules and Alerts box, go to the ‘Email Rules’ tab and select ‘New Rule’.
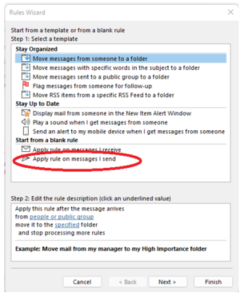
In the ‘Rules Wizard’, go to the ‘Start from a blank rule’ section, select ‘Apply rule on messages I send’, then select Next.
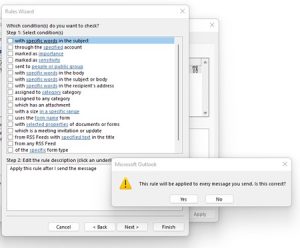
Clear all the check boxes in the Select condition(s) list. Then select ‘Next’. A confirmation box appears. Select ‘Yes’ to apply the rule to all sent messages.
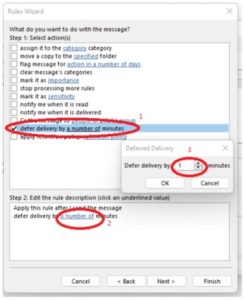
Complete 2 steps in the ‘Rules Wizard’:
Step one: select the ‘defer delivery by a number of minutes’ check box.
Step two: enter the number of minutes you want to delay emails by.
Select OK, and In the Rules Wizard, select ‘Next’.
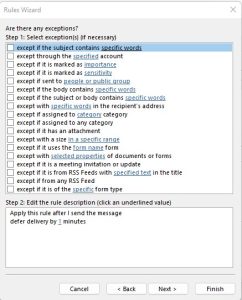
Click ‘Next’ in the exceptions.
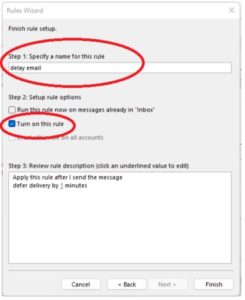
Type a descriptive name in the ‘Specify a name for this rule’ text box then check the ‘Turn on this rule’ check box. Select ‘Finish’ to complete this step.
Select OK to apply the changes in the Rules and Alerts dialog box.
The setup is done. When you select ‘Send’ for any email, it is stored in the Outbox folder where it waits the specified amount of time before being sent.
If you need to do any changes on the e-mail, select the email which is waiting in the ‘outbox’, do the necessary changes and then click send. Should you want to cancel this rule, you simply go to step 1 again, and in the Rules Wizard you can either unselect the rule, or you can delete it permanently.
If you require any assistance to delay or schedule sending email messages in Outlook, call us today.


